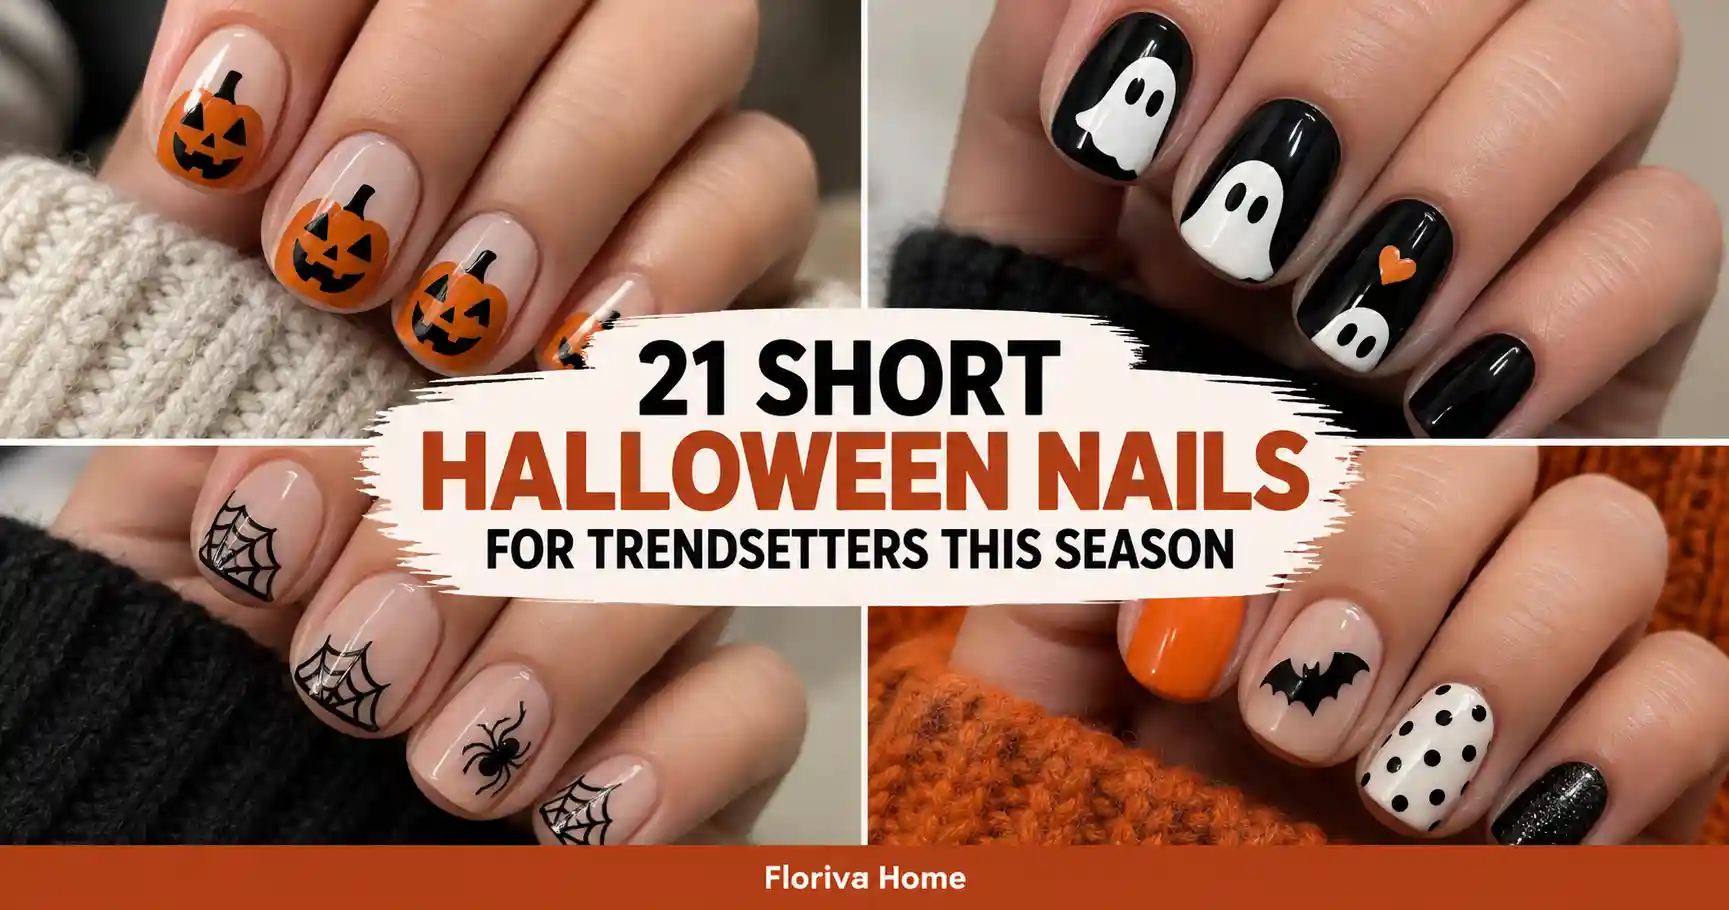
21 Short Halloween Nails for Trendsetters This Season
Halloween nails do not have to be long to make a statement. Short Halloween nails can be just as playful, stylish, and eye-catching while staying practical for everyday life. From tiny ghosts and glossy black details to spooky French tips and rich autumn shades, these designs offer plenty of ways to celebrate the season without sacrificing comfort. Whether you prefer something subtle for work or a bolder manicure for Halloween parties, you’ll find ideas here that suit different styles, nail shapes, and skill levels. These short Halloween nail ideas are easy to save, recreate, and personalize.
1. Tiny Ghosts on a Midnight Black Base
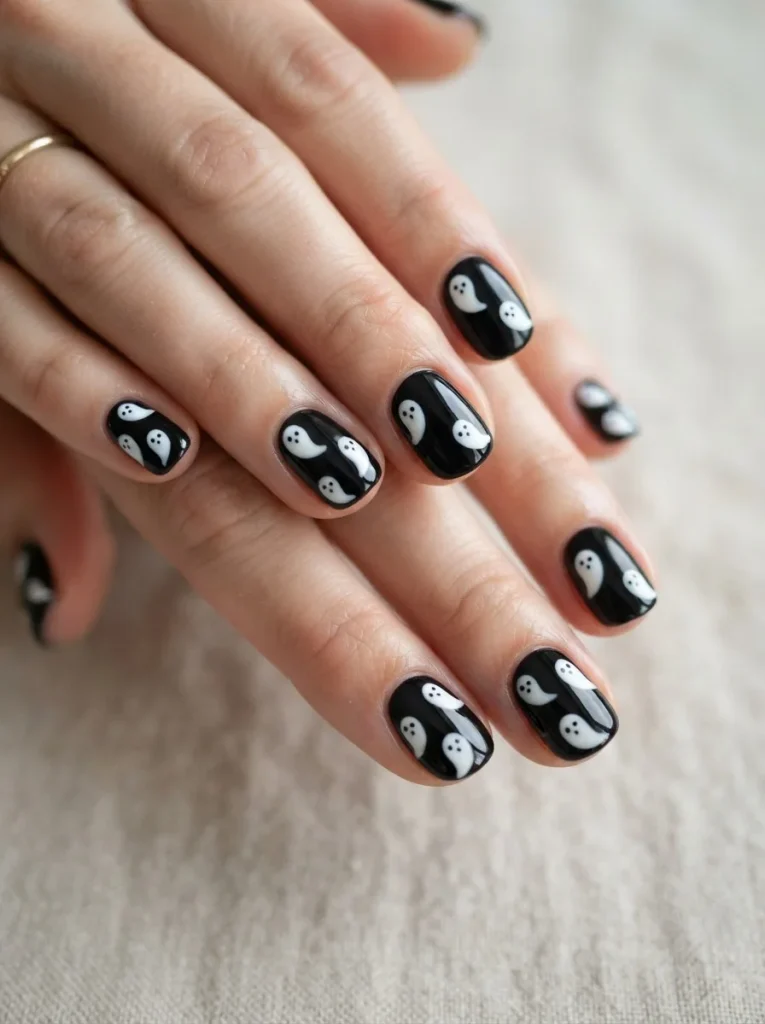
- Use a glossy black polish as the foundation so the white ghosts stand out sharply.
- Keep each ghost slightly different in size or expression for a playful finish.
- A fine nail-art brush makes the tiny eyes and curved ghost shapes easier to control.
- Finish with a high-shine top coat to make the manicure look professionally polished.
- This design works especially well on short square or squoval nails.
The contrast between black and white keeps this spooky manicure bold without making short nails look crowded. For a softer version, place ghosts on only two accent nails and leave the others black. A small amount of negative space around each character helps every detail remain visible.
2. Pumpkin Spice Micro French Tips
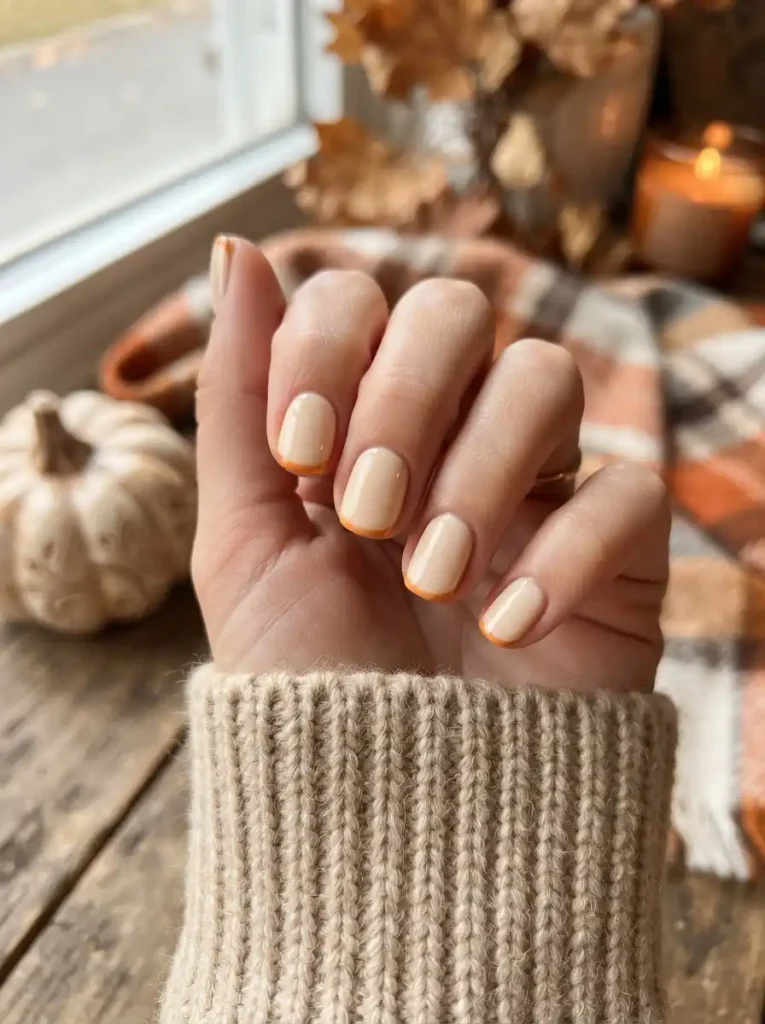
- Choose a sheer nude, beige, or milky base to keep the manicure airy.
- Paint the orange tips extremely thin for a refined micro-French effect.
- A burnt-orange shade feels more sophisticated than bright neon orange.
- Add one tiny pumpkin accent if you want a stronger Halloween connection.
- Keep the nail edges clean by using a fine detail brush or French-tip guide.
Unlike full orange nails, micro French tips give you a seasonal look that still feels polished enough for everyday outfits. Pair them with warm sweaters, denim, or gold jewelry. The narrow tip also leaves plenty of visual space, making this an excellent choice for petite short nails.
3. Black Cat Peekaboo Nails
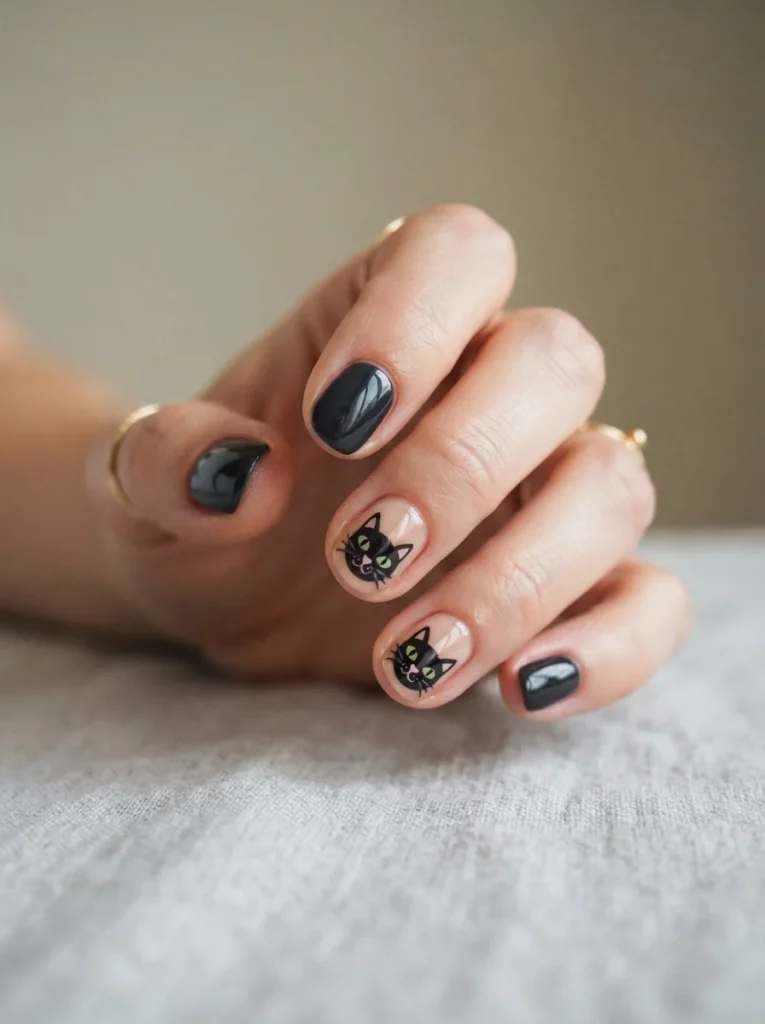
Quick Tip: Use black cat faces as tiny accent details rather than covering every nail with artwork. Two or three faces are enough to create the theme while allowing the rest of the manicure to breathe. A warm nude base makes the silhouettes especially noticeable.
Paint the remaining nails with glossy black or soft charcoal polish for balance. Add pointed ears, tiny whiskers, and small eyes using a precision brush, keeping the features minimal. This approach creates playful short Halloween nails without overwhelming the compact nail surface. A satin or glossy top coat can change the entire personality of the finished design.
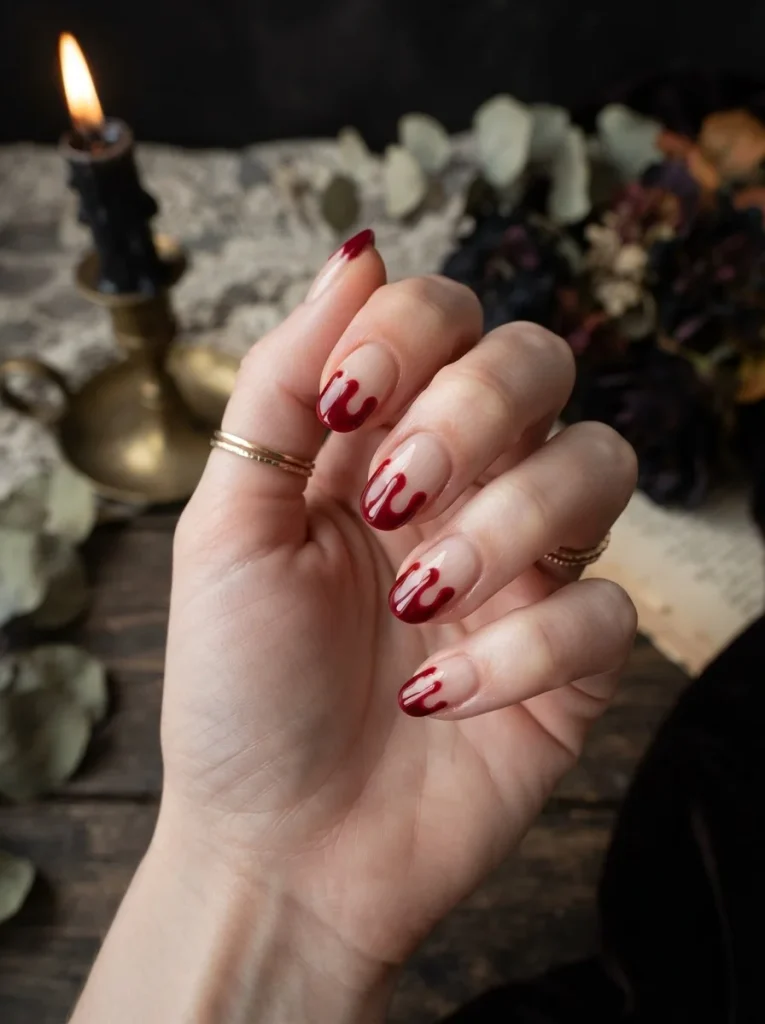
4. Blood-Red Drip French Tips
BEFORE
A standard nude manicure can look beautiful but may feel too ordinary for Halloween. On short nails, simply adding a thick dark-red tip can sometimes make the nail appear visually shorter.
AFTER
Turn the tip into an uneven dripping design using deep cherry or blood-red polish. Let a few rounded drips extend slightly downward while keeping the base nude and clean.
This dramatic manicure works because the negative space keeps the design balanced while the red drips create instant Halloween character. Choose a high-gloss finish for a wet-look effect, or use a darker burgundy shade when you want something more sophisticated than traditional bright red.
5. Spooky Checkerboard in Orange and Black
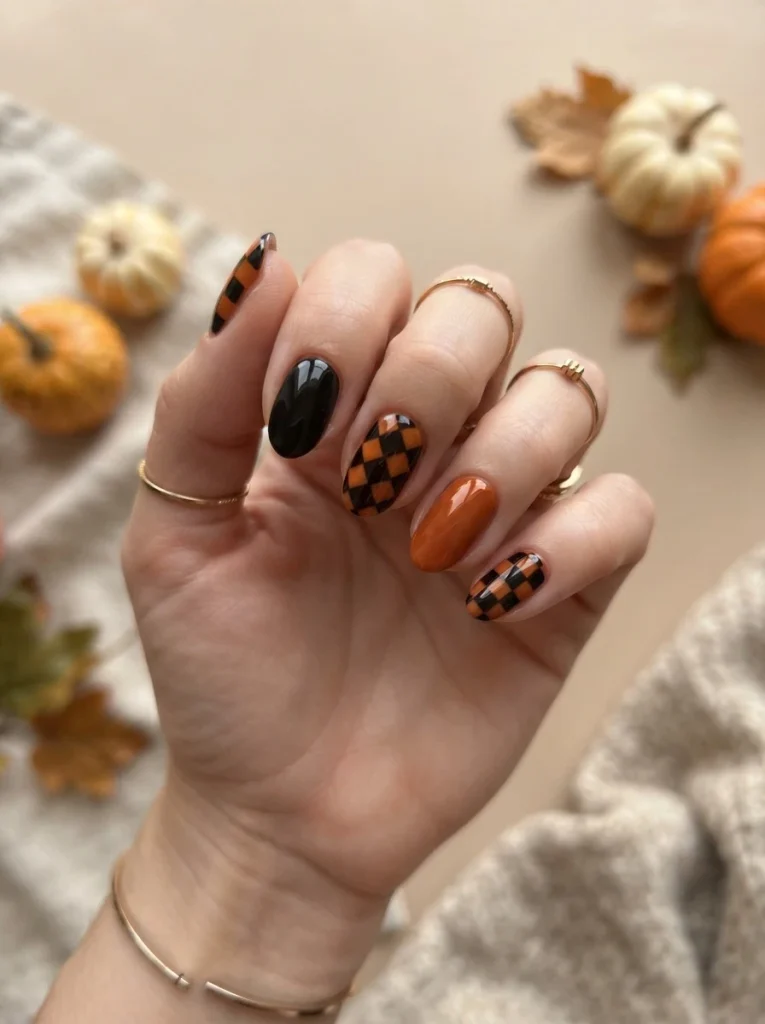
- Build the base: Apply a pale beige or soft orange base and let it dry completely.
- Map tiny squares: Use a detail brush to create small black and orange checkerboard sections.
- Vary the placement: Put the pattern diagonally on some nails and vertically on others.
- Seal carefully: Apply a smooth top coat without dragging the tiny painted squares.
Keep the checkerboard sections relatively small because oversized squares can dominate short nails. Mixing patterned nails with solid black or orange ones creates a more wearable result. This design suits trend-focused outfits particularly well and gives classic Halloween colors a playful graphic treatment.
6. Matte Black vs Glossy Black Mini Manicure
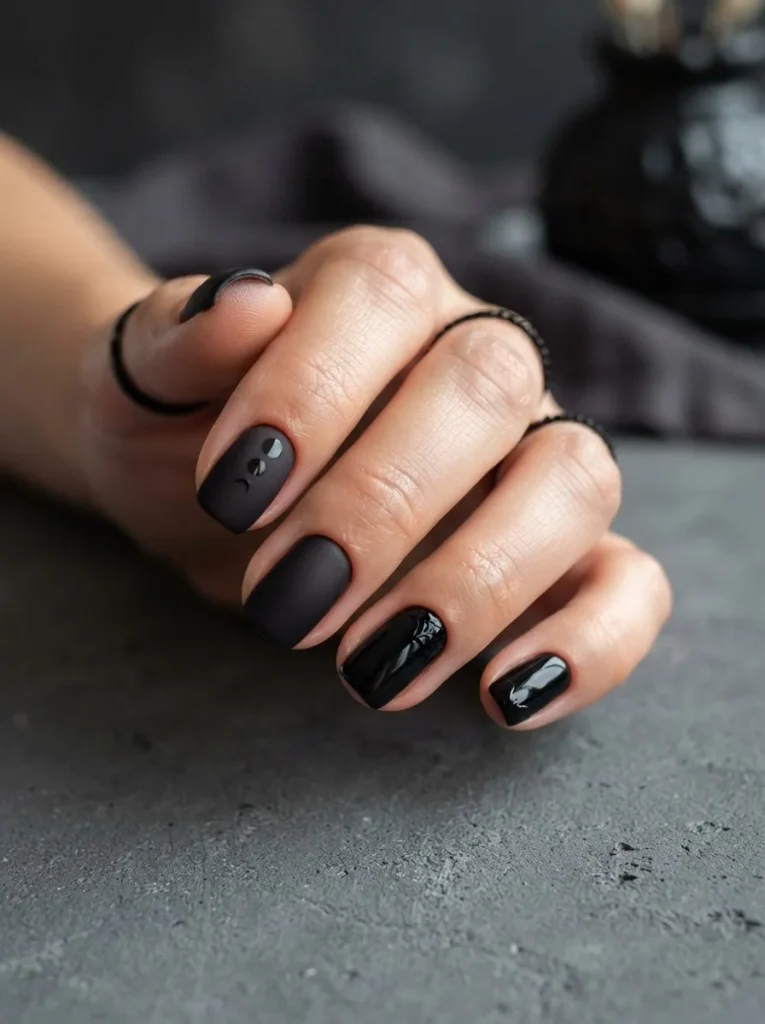
| Detail | Matte Black | Glossy Black |
| Overall mood | Soft, mysterious | Sleek, dramatic |
| Surface | Velvety | Reflective |
| Best pairing | Silver accents | Metallic accessories |
| Halloween feel | Subtle | High-impact |
Using both finishes together creates dimension without adding complicated artwork. Paint most short nails matte black, then add glossy black details such as tiny moons, tips, or dots. The same color appearing in two textures makes the manicure look intentional, modern, and surprisingly sophisticated for Halloween.
7. Do & Don’t for Mini Spiderweb Nails
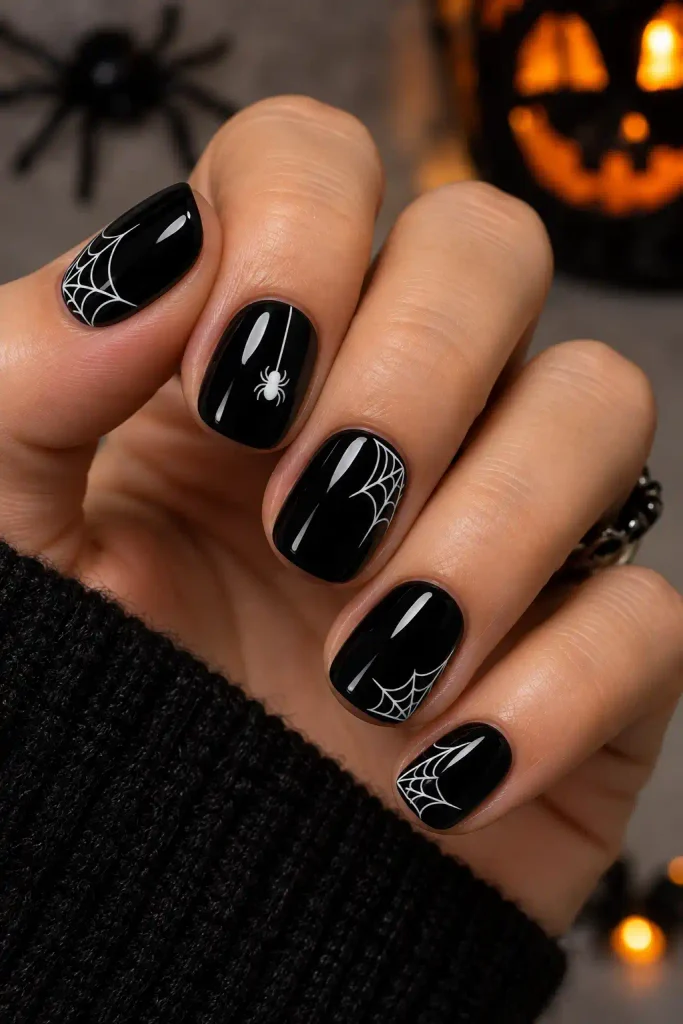
DO
- Place the spiderweb in one corner so it follows the natural nail shape.
- Use thin white or silver lines over a dark base.
- Leave generous negative space between the web strands.
- Add one tiny spider for a subtle focal point.
DON’T
- Draw thick web lines that hide the base color.
- Cover every nail with identical webs.
- Use too many tiny details on one short nail.
- Forget a protective top coat.
A corner spiderweb feels more delicate than a full-nail illustration and gives short nails an elongated visual direction. Black, charcoal, plum, and deep green bases all work beautifully. Silver web lines can make the manicure feel dressier, while white creates a brighter cartoon-inspired Halloween look.
8. Quick Facts: Orange Moonlight Nails
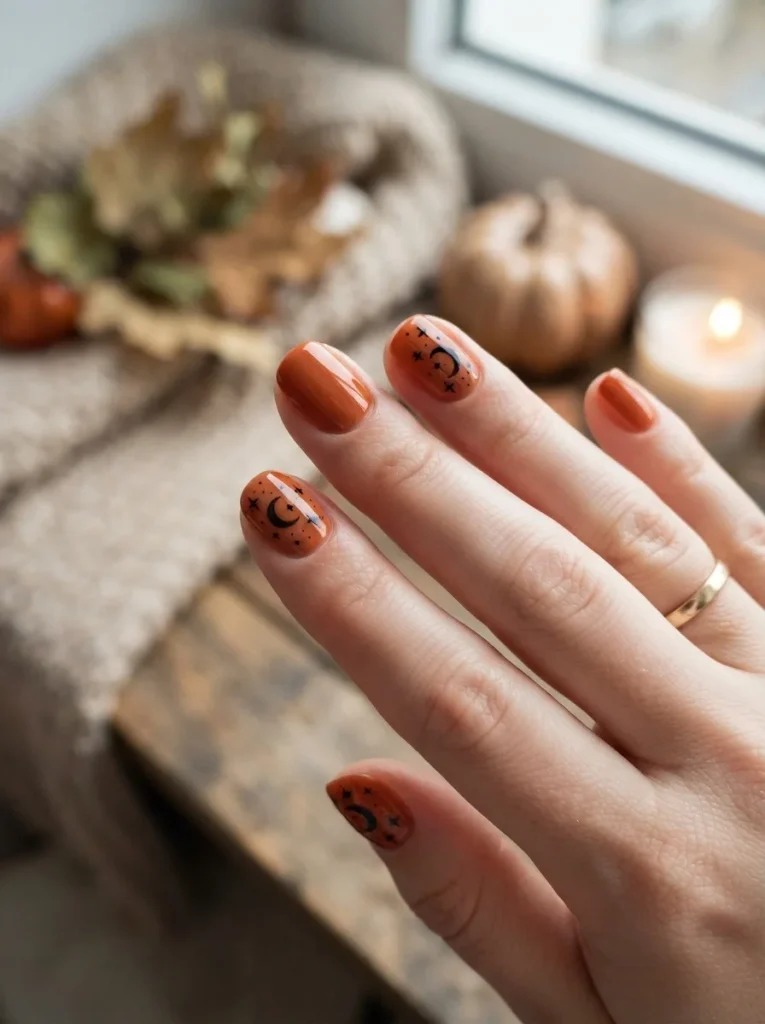
Cost: Low | Time: About 30–45 minutes | Skill Level: Beginner to intermediate
Best For: Short round, oval, or squoval nails
Palette: Burnt orange, black, cream, metallic gold
Style: Moody autumn Halloween
Paint a warm orange base on selected nails and add tiny black crescent moons, stars, or dots to create a miniature night-sky theme. Use cream accents on one or two nails to prevent the palette from becoming too dark. A glossy finish keeps this compact design crisp and wearable.
9. Candy Corn Color Blocking
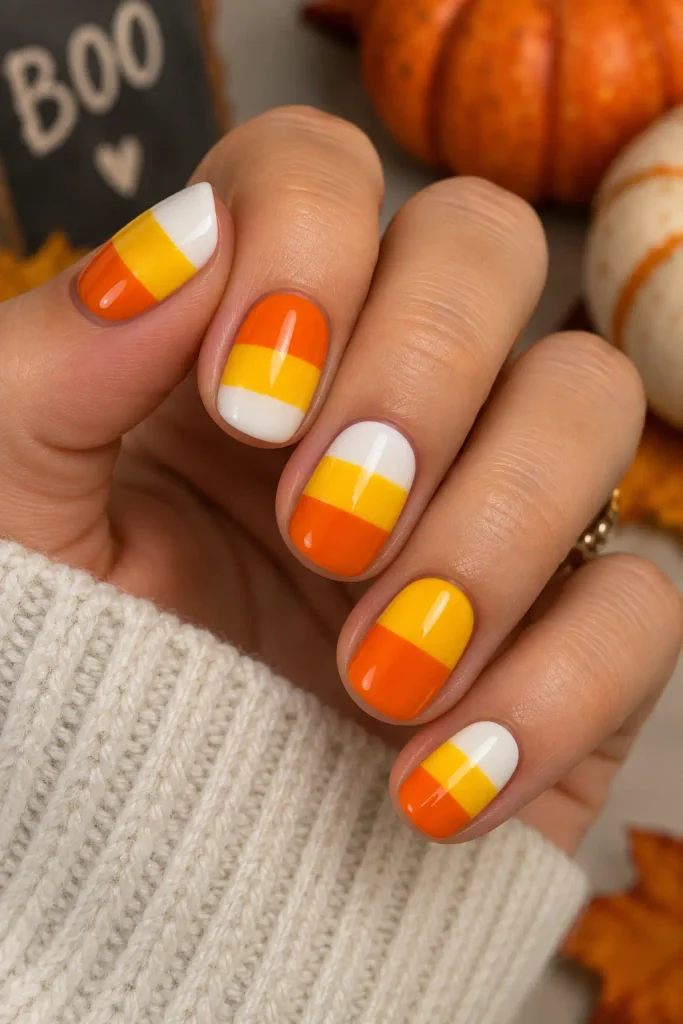
- Use three narrow color zones—creamy white, warm yellow, and orange—to recreate candy-corn colors without painting literal candy pieces.
- Show varied color placement across the nails so the manicure feels coordinated rather than identical.
- Keep the sections crisp with thin, clean dividing lines.
- Use a glossy finish to make the three-color blocks look polished.
- Pair the manicure with neutral fall clothing so the seasonal colors remain the focal point.
Paint each nail with carefully separated bands, or alternate the order on selected nails for a more artistic effect. Keep the lightest shade near the cuticle on some nails and toward the tip on others. This small change prevents the manicure from looking overly uniform while preserving the recognizable seasonal palette.
10. Cute Haunted House Accent Nails
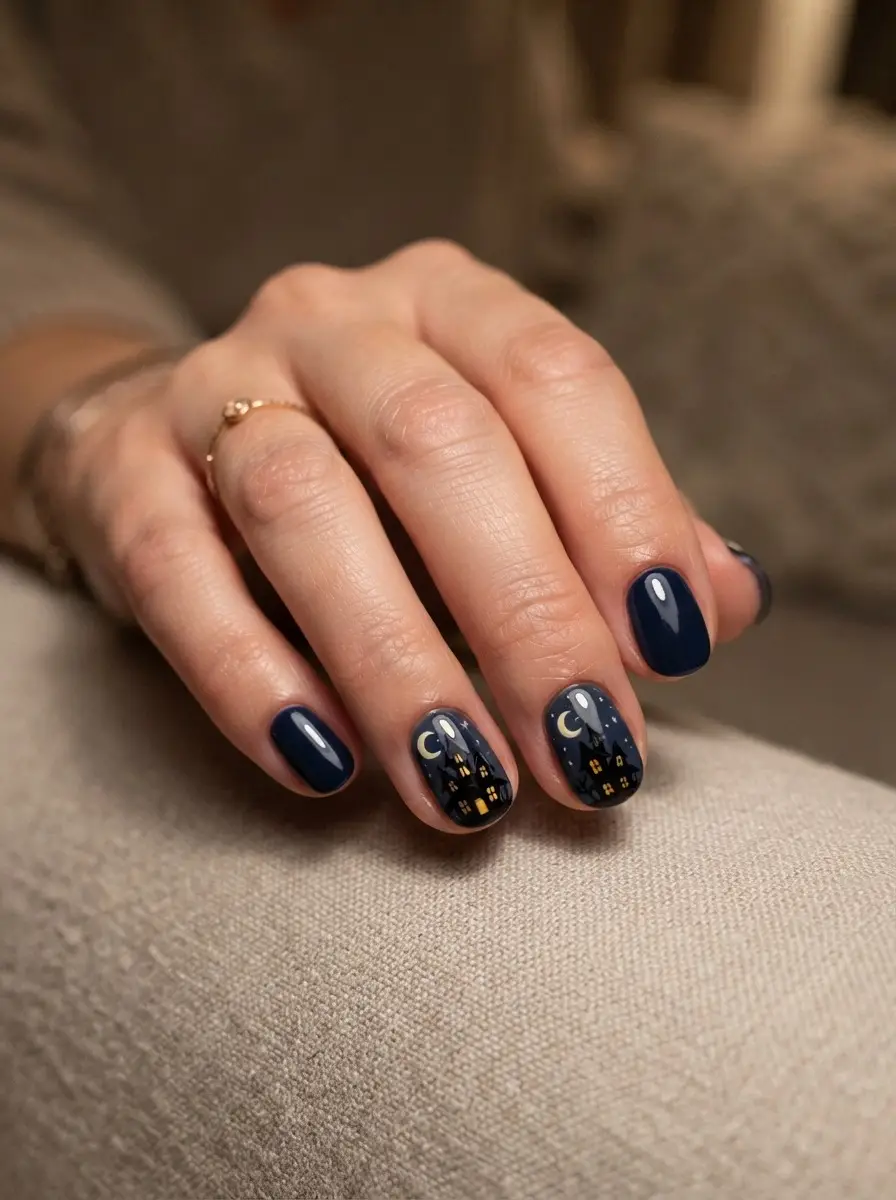
- Paint most nails a deep navy or charcoal shade to create the evening backdrop.
- Reserve one or two accent nails for a tiny haunted-house silhouette.
- Add miniature yellow windows to make the building look illuminated.
- Use a thin white brush to create a moon, stars, or wispy clouds.
- Keep the silhouette low on the nail so the artwork remains readable.
The haunted-house design gives you a tiny Halloween scene rather than a single symbol. On short nails, simplicity matters, so focus on the roofline, windows, and one moon instead of adding numerous architectural details. A deep blue background also offers a refreshing alternative to the usual black manicure.
11. Purple Potion Bottle Details
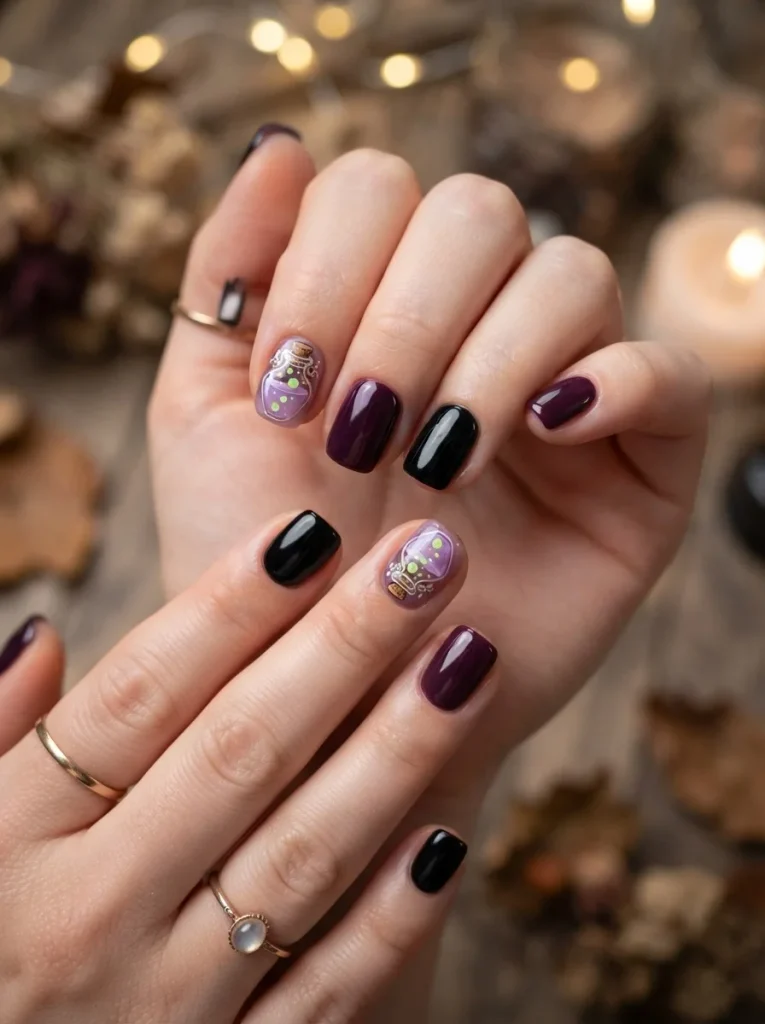
Quick Tip: Choose a translucent lavender or jelly-purple polish for the base of your accent nails. The slightly see-through effect creates the impression of glowing potion glass, especially when paired with tiny lime-green bubbles or metallic highlights.
For the surrounding nails, use deep plum or glossy black to frame the brighter potion artwork. Paint miniature bottle shapes with a thin brush and add a small label-like symbol rather than detailed lettering. This design feels whimsical and magical while remaining compact enough for short nails and easy to customize with different jewel-toned shades.
12. Ghostly White Chrome Accents
BEFORE
Plain white polish can sometimes look more bridal than spooky, particularly when applied across every short nail. A completely opaque finish may also lack the seasonal dimension you want.
AFTER
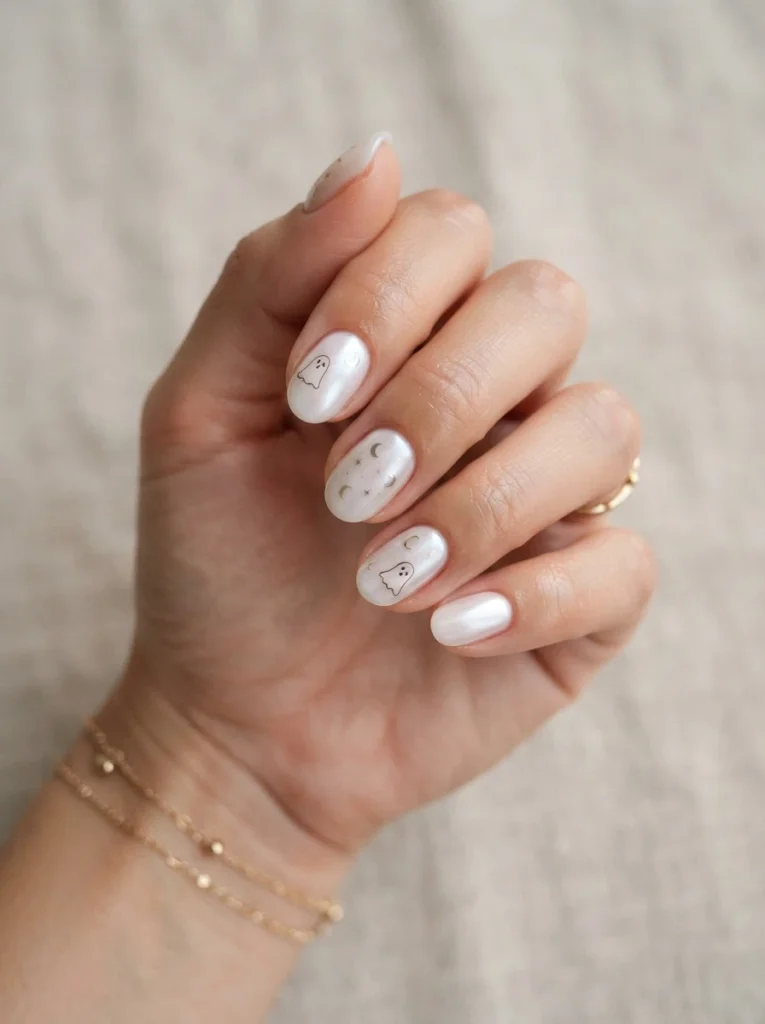
Use a soft milky-white base and add subtle pearly chrome on selected nails. Tiny ghost outlines or crescent details provide the Halloween connection without turning the manicure into a cartoon.
The result is a ghost-inspired manicure with a clean, luminous appearance. It works especially well when you want short Halloween nails that transition easily from daytime plans to evening celebrations. Keep the chrome concentrated on accent nails so the design remains refined rather than overly reflective.
13. Step Into a Spider-Eye Accent Design
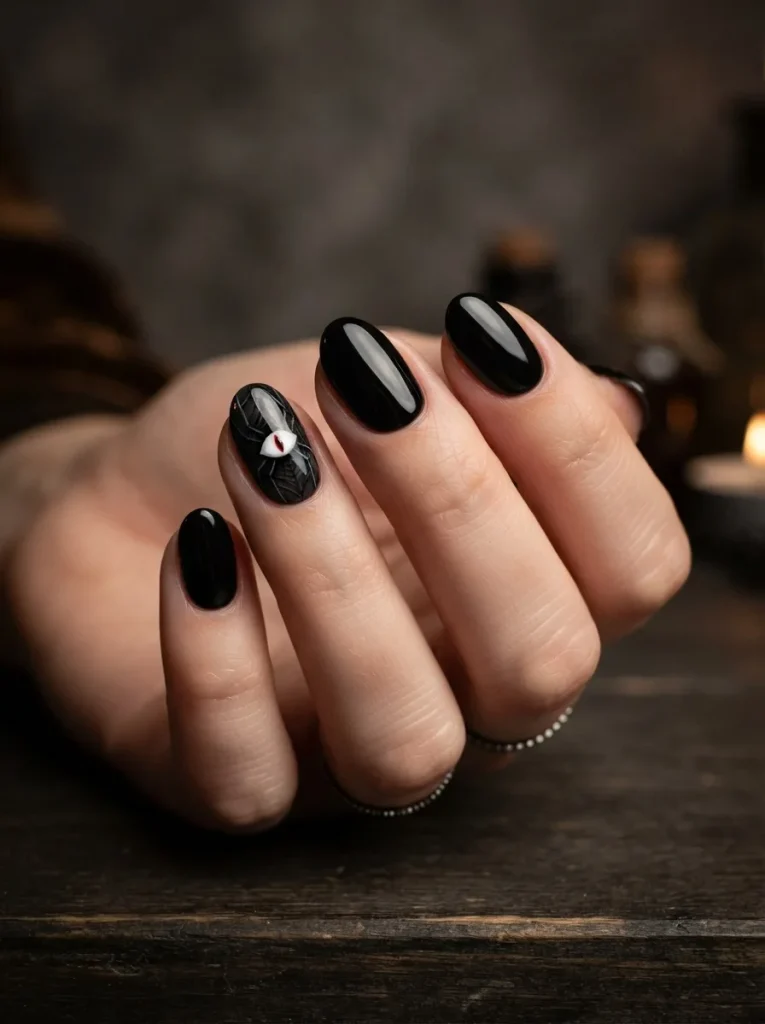
- Choose the base: Apply glossy black, dark plum, or midnight blue to your short nails.
- Create the eye: Paint a small almond-shaped white oval on one or two accent nails.
- Add the center: Place a tiny red or orange dot in the middle.
- Frame it: Draw a few delicate spider-leg lines around the eye.
- Finish: Seal the design once every detail has dried.
This creepy-cute design works because the eye becomes an unexpected focal point rather than covering the whole manicure. Keep the surrounding nails simple and dark. For a less intense version, replace red pupils with gold or lavender and use fewer surrounding lines.
14. Minimalist Halloween Symbols Mix
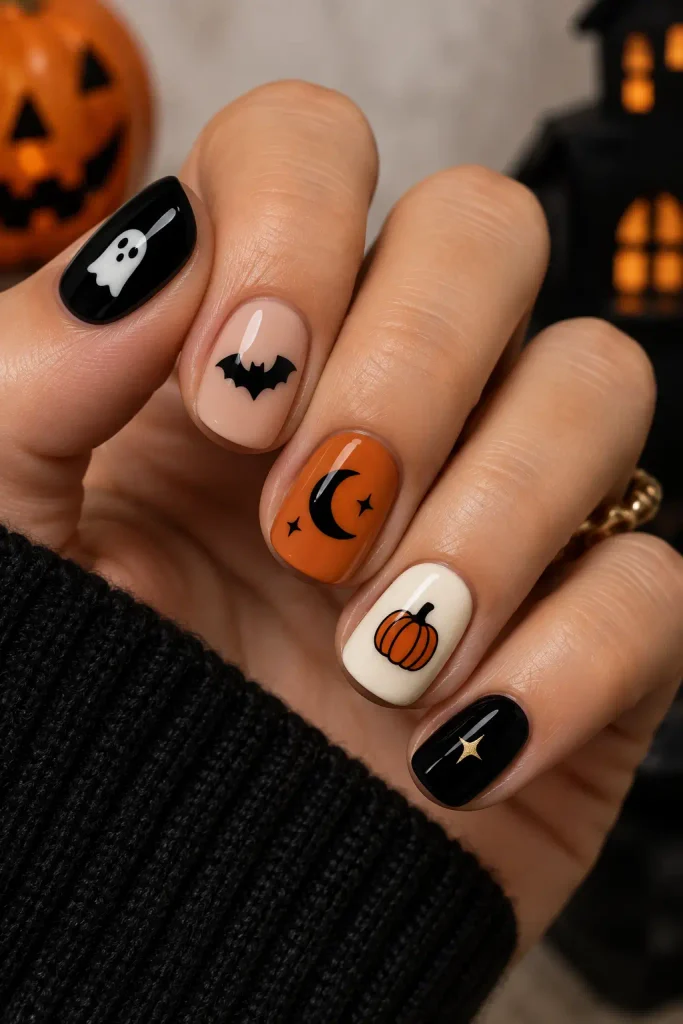
| Symbol | Visual Effect | Best Base |
| Tiny bat | Playful and graphic | Nude |
| Crescent moon | Mystical | Black |
| Mini pumpkin | Cheerful | Cream |
| Little ghost | Cute | Charcoal |
Combining tiny symbols gives each nail its own personality while maintaining a unified Halloween theme. Choose one symbol per nail and repeat the same two or three colors throughout. The key is scale: miniature artwork leaves enough background visible to keep short nails looking clean and uncluttered.
15. Do & Don’t With Deep Burgundy Nails
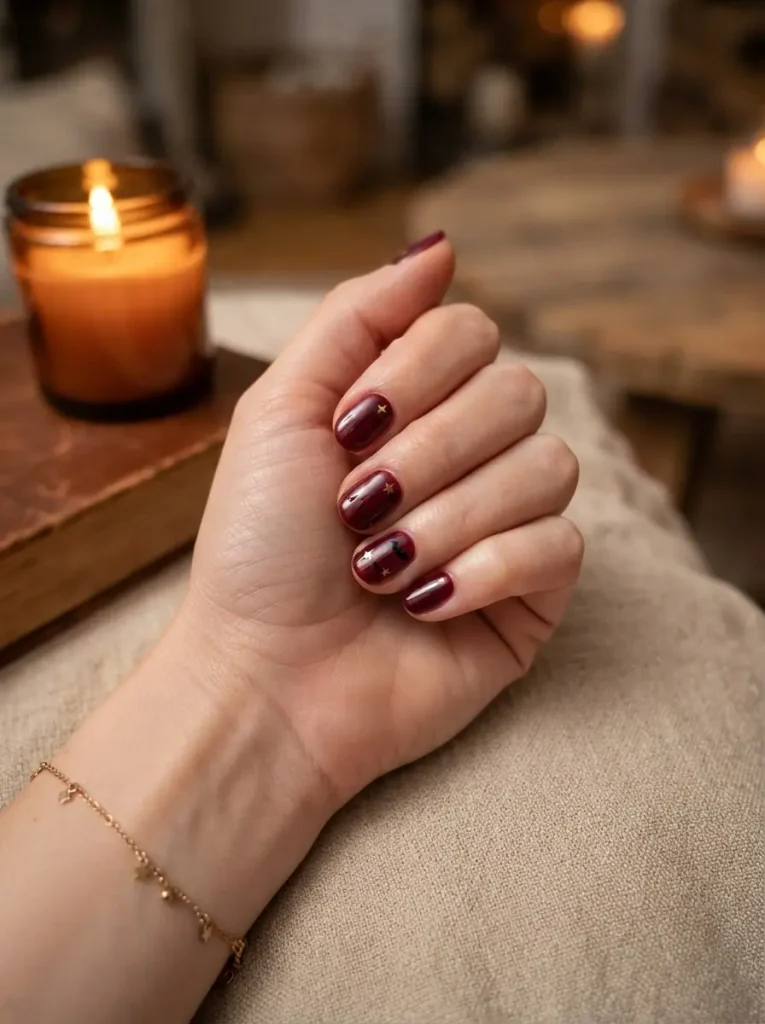
DO
- Choose a rich wine or burgundy polish with strong pigmentation.
- Add tiny black bats or gold stars to one or two nails.
- Keep the shape softly rounded for an elegant finish.
- Use glossy top coat to intensify the jewel-like color.
DON’T
- Cover every nail with multiple contrasting decorations.
- Mix several red tones that compete with the base.
- Use oversized artwork that hides the burgundy surface.
- Skip cleanup around the cuticle area.
Deep burgundy is perfect when you want Halloween inspiration without obvious novelty art. It sits comfortably between autumn manicure and spooky-season styling. Add restrained black or metallic details, and the result can work with evening outfits, office clothing, or casual fall layers without looking costume-like.
16. Quick Facts: Smoky Gray Nail Tips With Tiny Bats
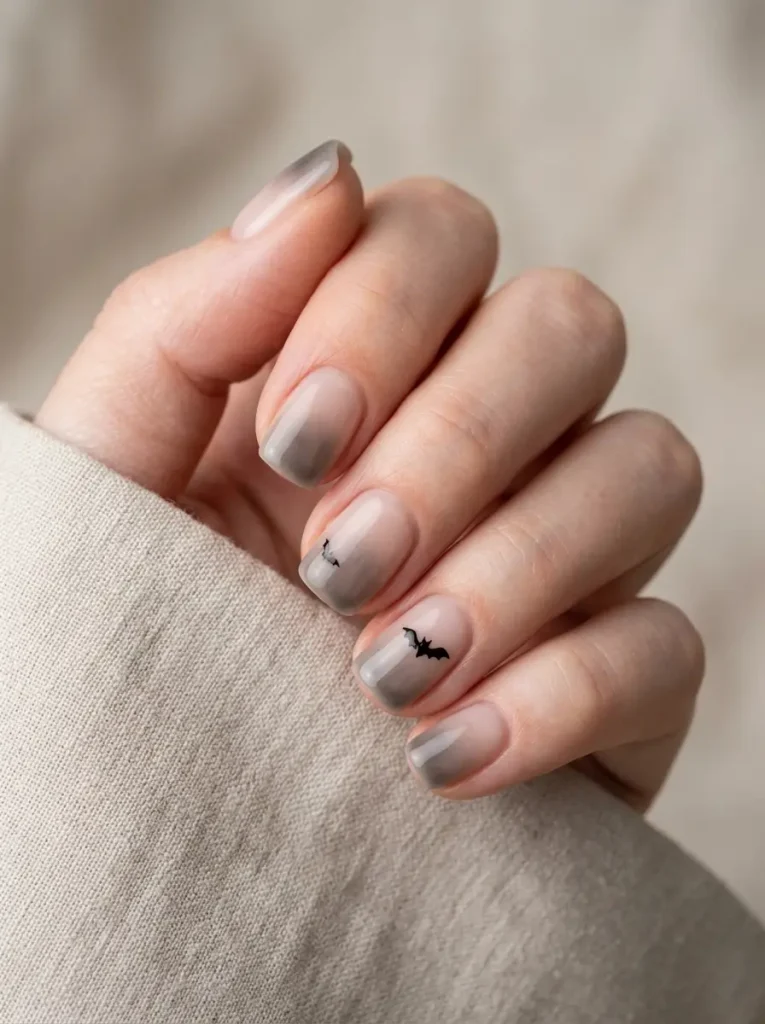
Cost: Low | Time: 35–50 minutes | Skill Level: Beginner
Best For: Short square or squoval nails
Colors: Smoky gray, black, soft nude
Detail: Tiny bat silhouettes
Finish: Glossy or satin
Start with a translucent nude base and blend smoky gray toward the tips for a soft shadow effect. Add one tiny black bat across selected nails rather than repeating it everywhere. The hazy gradient gives this Halloween manicure a moody appearance while preserving plenty of negative space around the artwork.
17. Pumpkin Patch Accent Nails
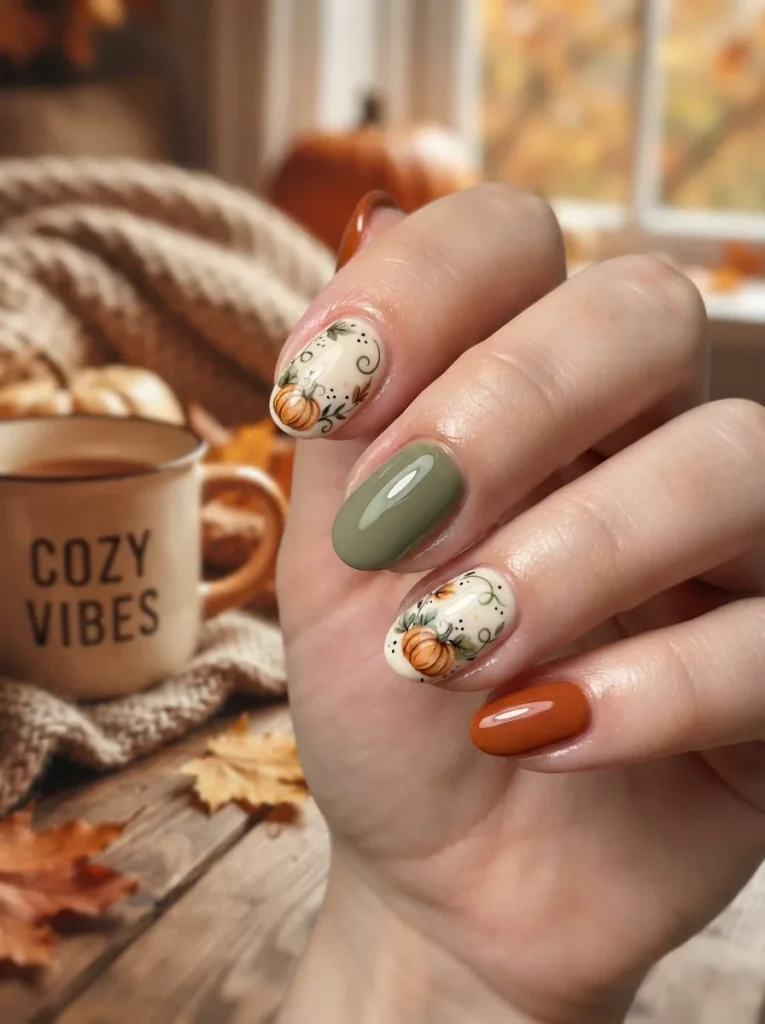
- Use a cream base on selected nails to make the miniature pumpkins stand out.
- Paint tiny orange pumpkins with slightly varied shapes for a hand-painted effect.
- Add muted sage stems and delicate curling vines for an autumnal finish.
- Keep neighboring nails in solid orange, sage, or cream to balance the artwork.
- Finish with a glossy top coat to protect the small details.
Keep the pumpkins small and vary their shapes slightly so they look hand-painted rather than stamped. Use muted sage instead of bright green for a more autumnal palette. Place pumpkins along the lower half of accent nails while keeping neighboring nails cream or orange. This creates a cohesive seasonal manicure with a handmade charm.
18. Elegant Black Lace Halloween Tips
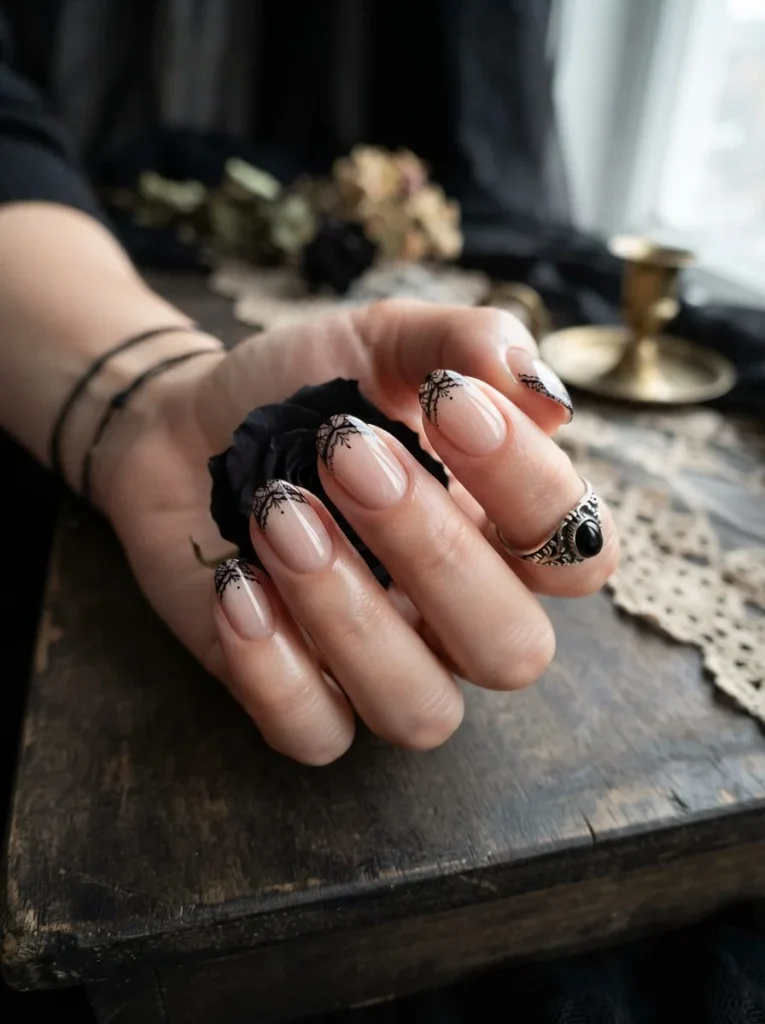
Quick Tip: For a sophisticated spooky look, treat lace like French-tip artwork. Paint a nude or blush base first, then create a thin scalloped black border near the free edge. Add only a few tiny crossing lines so the pattern resembles delicate lace instead of a dense web.
This design is particularly flattering on short almond or oval nails because the curved lace edge follows the natural silhouette. It pairs beautifully with black dresses, sheer sleeves, or silver jewelry. A glossy top coat enhances the contrast between the soft base and intricate dark edging.
19. Neon Green Monster Claws
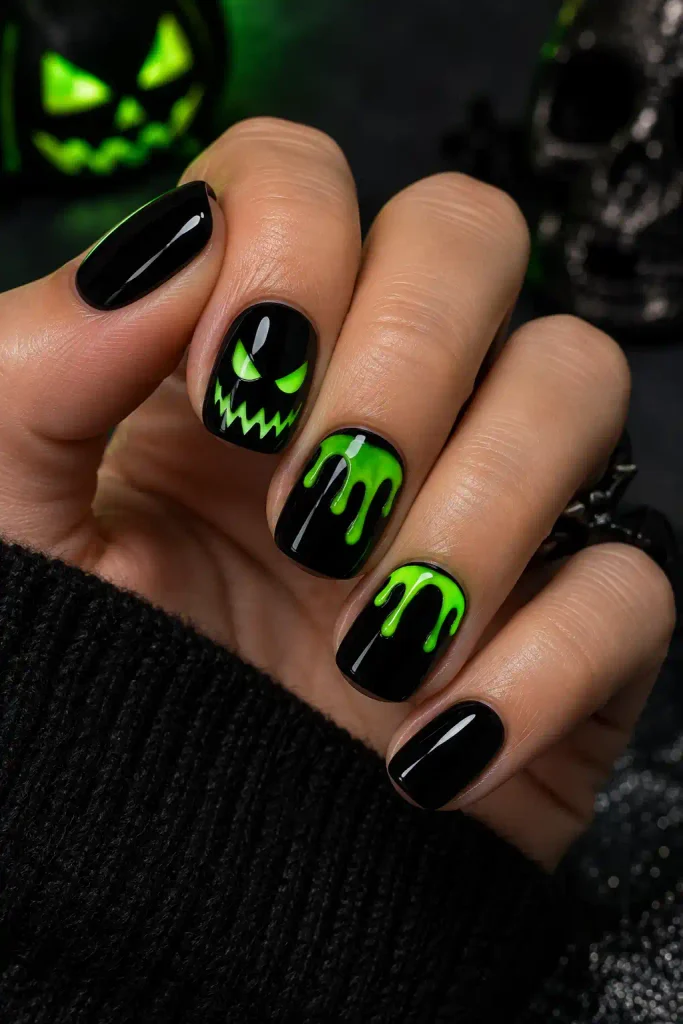
BEFORE
A plain black manicure gives you a strong Halloween foundation, but it may feel predictable if you prefer playful, trend-forward nail art.
AFTER
Add bright slime-green monster details to selected black nails. Create jagged eyes, tiny teeth, or dripping green shapes while leaving the remaining nails completely black.
The electric green immediately changes the personality of the manicure and makes the short length feel intentional rather than limiting. Keep the artwork graphic and oversized enough to read clearly from a distance. This option is especially fun for Halloween parties, concerts, or anyone who prefers colorful seasonal nail designs.
20. Step-by-Step Midnight Star Nails
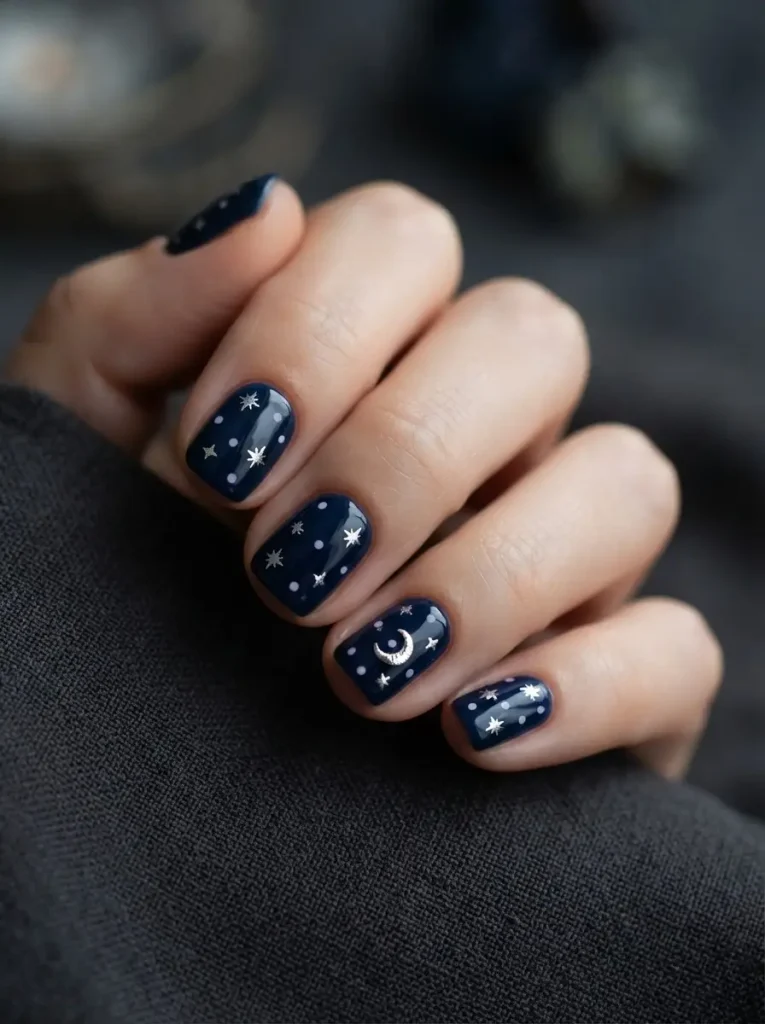
- Apply midnight blue: Cover every short nail with a deep navy polish.
- Add the glow: Place tiny silver or pale-lavender dots where you want the stars.
- Create crescents: Paint miniature crescent moons on two accent nails.
- Vary the spacing: Leave some areas empty so the night-sky pattern feels natural.
- Seal the look: Finish with glossy top coat for a smooth, reflective surface.
The midnight palette creates a Halloween atmosphere without relying on orange. Silver stars add sparkle while the dark blue keeps the manicure sophisticated. If you prefer warmer styling, substitute antique gold for silver. The scattered placement also prevents the compact nail surface from looking overcrowded.
21. Classic Black-and-Orange Halloween Mix
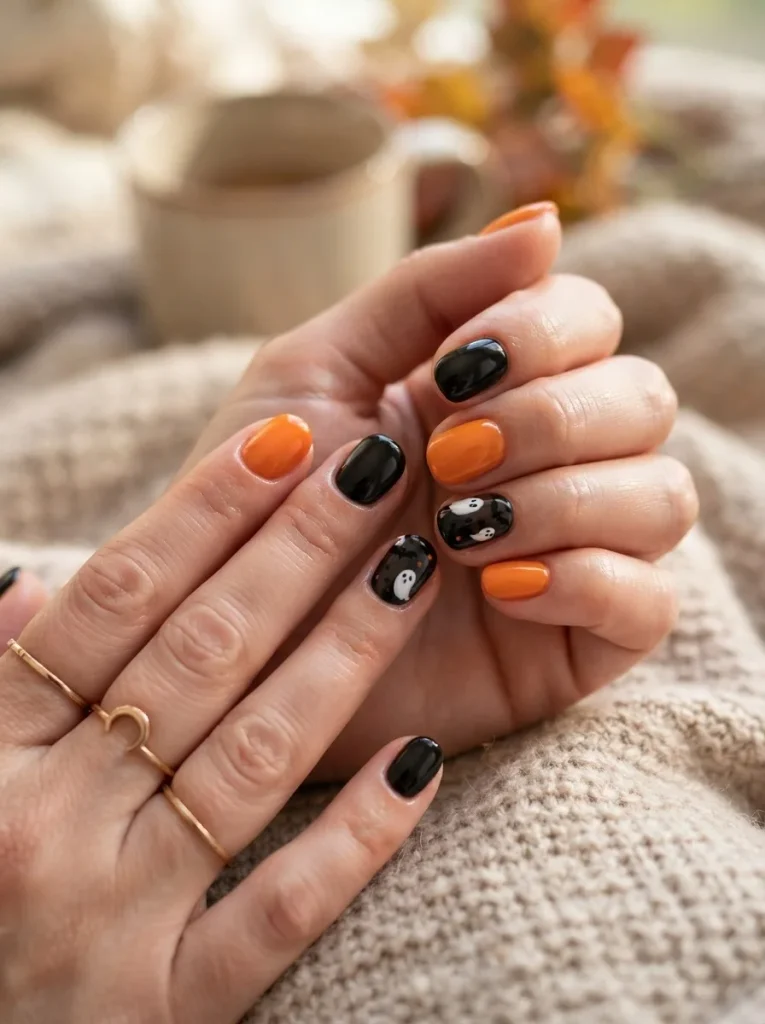
| Element | Black Nails | Orange Nails |
| Mood | Mysterious | Energetic |
| Best Detail | White ghost | Black bat |
| Finish | Glossy | Creamy or glossy |
| Styling | Evening | Playful daytime |
Combining solid black and orange nails gives you the unmistakable Halloween palette while keeping the manicure easy to recreate. Add one small accent detail if desired, but let most nails remain solid. This approach is ideal when you want seasonal impact with minimal nail-art work and a polished short-nail silhouette.
Conclusion
Short Halloween nails prove that you do not need extra length to create a memorable seasonal manicure. Whether you prefer tiny ghosts, smoky colors, pumpkin accents, spooky symbols, or elegant black details, the right design can make compact nails feel stylish and intentional. Consider your usual wardrobe, nail shape, and comfort level before choosing a look, then personalize the colors or artwork to make it your own. The best short Halloween nail ideas are practical enough for everyday wear while still capturing the playful, mysterious spirit of the season.
Frequently Asked Questions
1. What are the best Halloween nail designs for short nails?
The best designs are those that use compact artwork and enough negative space to keep the nails visually clean. Tiny ghosts, bats, moons, spiderweb corners, micro French tips, checkerboard patterns, and simple pumpkin accents all work particularly well on short nails.
2. Can short nails still have detailed Halloween nail art?
Yes. The key is simplifying the artwork rather than removing detail completely. Use a fine nail-art brush for tiny features and place more elaborate designs on one or two accent nails. Dark backgrounds with contrasting details can also make miniature artwork easier to see.
3. What colors work best for short Halloween nails?
Classic black, orange, white, burgundy, deep purple, midnight blue, and smoky gray are versatile Halloween choices. You can also add metallic gold, silver, or neon green for contrast. Using one dominant shade with one or two accent colors usually keeps short manicures balanced.
4. Are short Halloween nails suitable for everyday wear?
Absolutely. Minimal designs such as black French tips, tiny moons, burgundy polish, small bats, or subtle ghost outlines can feel festive without being overly dramatic. They are especially useful if you want a Halloween manicure that works with casual outfits and professional clothing.
5. How can I make short Halloween nails look longer?
Try designs that create vertical or diagonal movement, such as narrow French tips, elongated ghost shapes, corner spiderwebs, or centered decorative details. Keeping the cuticle area clean and using a sheer or nude base can also create more visible nail surface and a more elongated appearance.