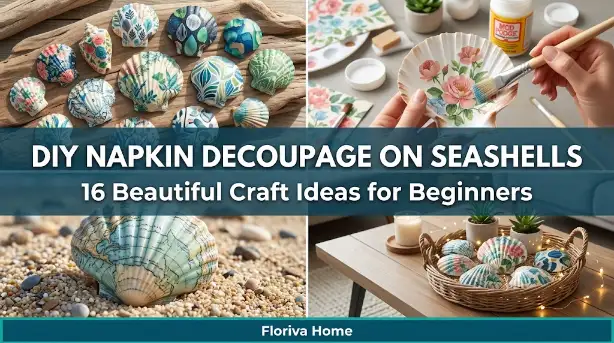
DIY Napkin Decoupage on Seashells – 16 Beautiful Craft Ideas for Beginners
DIY napkin decoupage on seashells is a creative and relaxing craft that turns simple beach treasures into elegant handmade decor. Using decorative napkins, glue, and a little imagination, beginners can create stunning coastal-inspired pieces for gifts, home decoration, or seasonal displays.
This easy craft project is perfect for anyone who loves DIY decor ideas and wants to explore beginner-friendly decoupage techniques. From floral patterns to vintage designs, these seashell crafts offer endless inspiration while adding a personalized artistic touch.
What is napkin decoupage on seashells?
Napkin decoupage on seashells is a DIY craft technique where decorative paper napkins are glued onto seashell surfaces to create beautiful handmade designs. It is popular for making coastal home decor, personalized gifts, and beginner-friendly creative craft projects.
1. Choose Large Flat Seashells
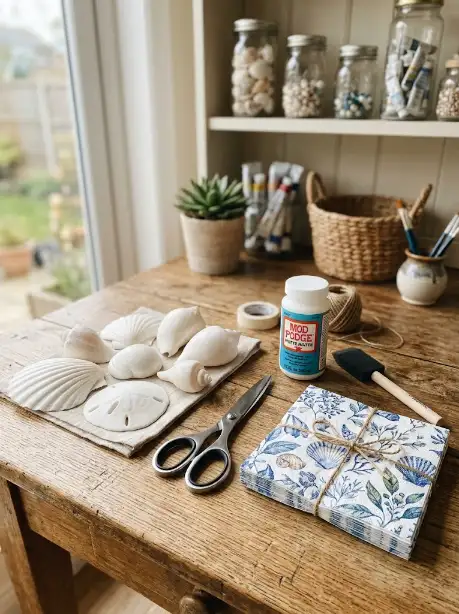
Start by selecting large flat seashells because smooth surfaces make napkin decoupage easier for beginners. Flat shells provide more room for decorative patterns and allow designs to settle neatly without folding or tearing during the crafting process.
Wash the shells carefully with warm water and remove dust or tiny sand particles. Let them dry completely before beginning. A clean shell surface helps glue stick properly and creates a polished professional look for your DIY seashell craft project.
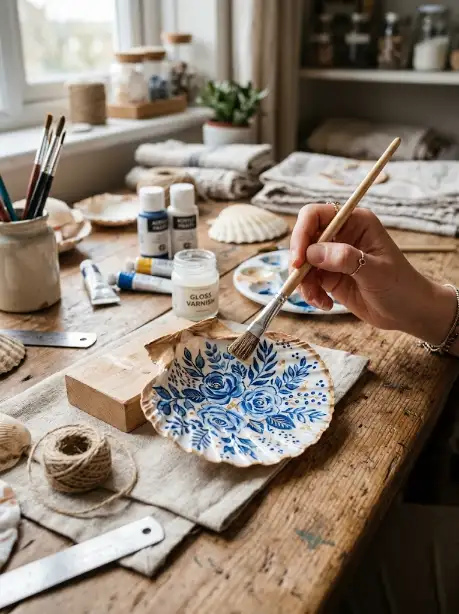
2. Pick Floral Pattern Napkins
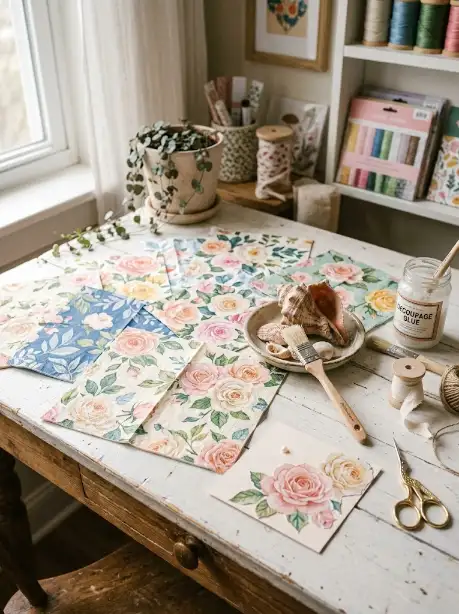
Soft floral napkins are one of the best choices for beautiful decoupage shell art. Delicate roses, wildflowers, and botanical prints create elegant handmade designs while making finished shells look decorative enough for home styling.
Choose thin paper napkins because thicker materials can wrinkle during glue application. Remove extra paper layers carefully and keep only the printed top layer. Thin decorative napkins help create smooth seamless finishes for beautiful beginner decoupage crafts.
3. Paint a White Background
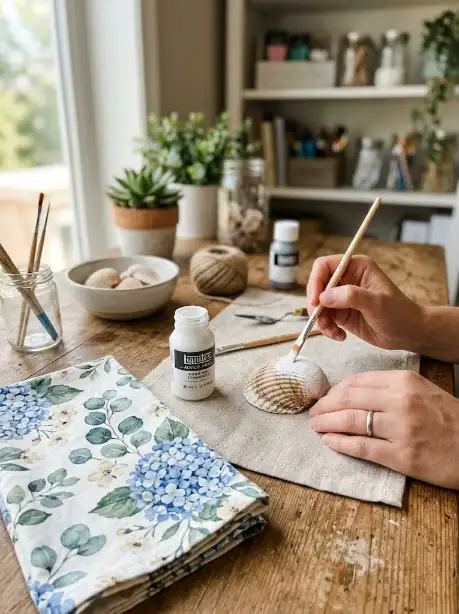
Adding white acrylic paint creates a brighter base underneath decorative napkin designs. This technique helps patterns remain vibrant and colorful while preventing natural shell colors from dulling delicate floral or vintage printed artwork.
Apply one thin paint coat using a small soft brush and let it dry fully. A smooth painted base gives better napkin adhesion while helping beginners achieve clean professional-looking decoupage shell crafts with stronger decorative contrast.
4. Cut Decorative Shapes Carefully
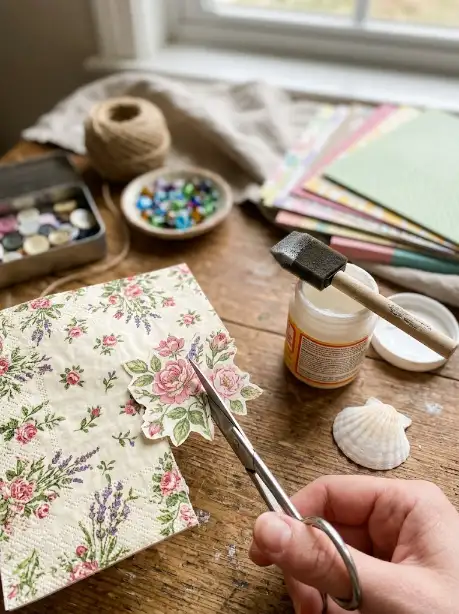
Cutting decorative napkin pieces carefully helps maintain neat edges and prevents unwanted tearing during application. Beginners should start with simple patterns like flowers, leaves, butterflies, or ocean-inspired shapes for easier placement.
Use small precision scissors for cleaner design details and slow movements around intricate patterns. Neatly cut designs blend better on shell surfaces and improve the final appearance of your handmade napkin decoupage seashell art.
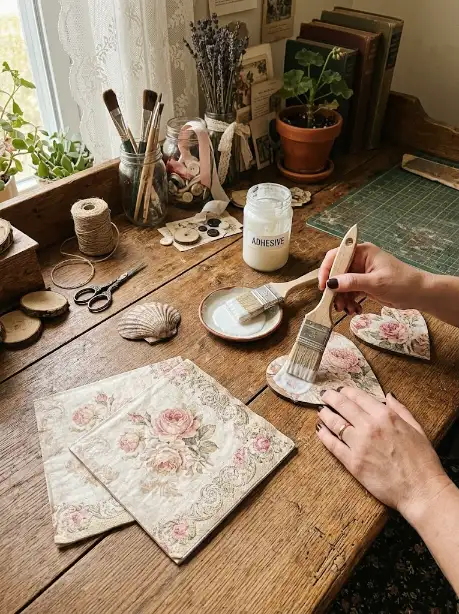
5. Apply Thin Glue Layers
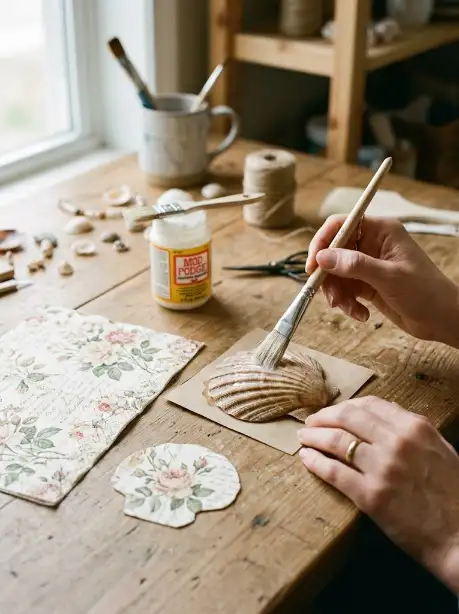
Using thin glue layers prevents wrinkles while keeping decorative napkin paper smooth against curved shell surfaces. Thick glue can cause paper bunching, so applying controlled light layers gives better results for beginner decoupage crafts.
Dip a soft brush lightly into decoupage glue and spread evenly across the shell surface. Gentle brush strokes improve control and help paper attach naturally while keeping delicate decorative patterns safe from tearing or shifting.
6. Press Napkin Gently
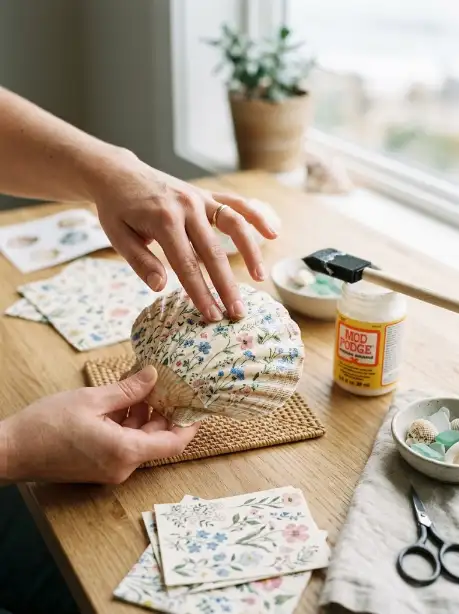
Place the napkin design slowly onto the glued shell and press gently using fingertips. Moving too quickly can create wrinkles or accidental tearing, especially when working with thin decorative paper materials.
Start pressing from the center and slowly move outward toward shell edges. This simple technique helps remove trapped air bubbles while ensuring your DIY decoupage seashell art looks smooth, polished, and professionally handcrafted.
7. Use Sponge for Smooth Finish
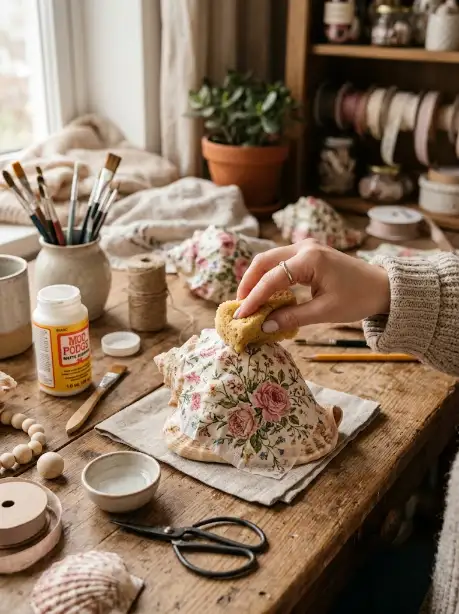
Soft cosmetic sponges work wonderfully for smoothing decorative napkin surfaces after placement. Unlike fingers, sponge pressure stays even and helps reduce wrinkles while protecting delicate paper from accidental tearing during the decoupage process.
Tap lightly instead of dragging the sponge across the shell. This technique creates smoother results and gives beginners better control when creating elegant handmade seashell decorations with professional-quality finishing touches.
8. Seal with Protective Finish
After drying completely, apply a protective top coat over your seashell design. Sealers protect decorative napkins from peeling while making finished shells more durable for home decor, gifts, or long-term decorative display.
Choose glossy finish for shiny elegant designs or matte finish for softer natural coastal aesthetics. Applying two thin coats instead of one thick layer creates stronger protection and improves the overall beauty of handmade decoupage seashell crafts.
9. Try Vintage Printed Designs
Vintage printed napkins featuring script text, faded roses, antique patterns, or delicate lace designs create elegant classic seashell decorations perfect for decorative trays or cottage-inspired home styling projects.
Combining vintage patterns with natural shell texture produces timeless handmade decor pieces. Beginners often enjoy this style because aged designs naturally blend imperfections, making small wrinkles less noticeable after the decoupage process.
10. Create Ocean Theme Shells
Ocean-themed decoupage shells capture beach-inspired beauty using starfish prints, coral patterns, waves, or tropical sea designs. These decorative shells work beautifully for coastal home decor and summer-themed decorative arrangements.
Blue shades, sandy beige colors, and marine patterns complement natural shell textures perfectly. Beginners love ocean-themed decoupage because the designs naturally match the shell surface and create relaxing seaside-inspired handmade decorations.
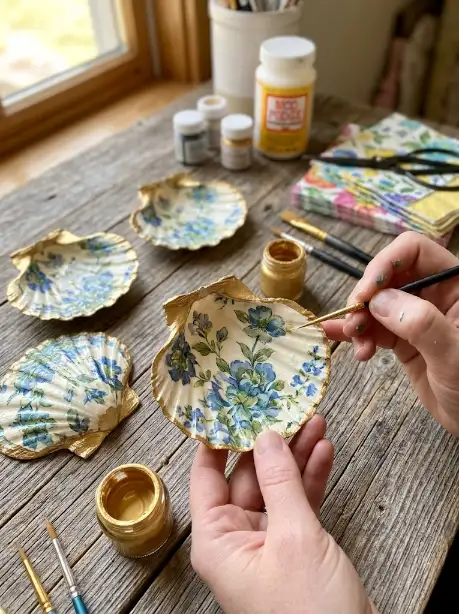
11. Add Gold Edge Details
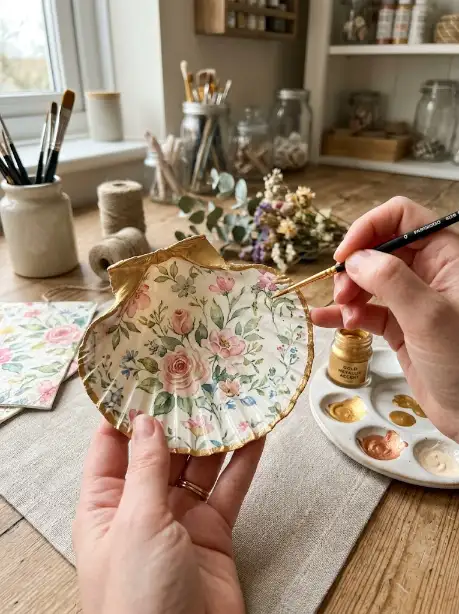
Painting thin gold accents around shell edges instantly adds luxury and makes handmade crafts look more expensive. Metallic detailing creates contrast while highlighting the decorative napkin design beautifully after sealing.
Use fine detail brushes for clean gold lines and avoid applying too much paint. Gold edging works especially well with floral or vintage designs and creates elegant seashell decorations perfect for gifting purposes.
12. Mix Multiple Patterns

Combining different napkin patterns creates more creative and visually interesting decoupage shell designs. Mixing floral prints, butterflies, leaves, or abstract designs allows beginners to experiment with personalized decorative combinations.
Try balancing large patterns with smaller decorative elements to avoid overcrowding shell surfaces. Pattern mixing encourages creativity while helping crafters discover unique DIY seashell art styles perfect for decorative collections.
13. Personalize with Initial Letters
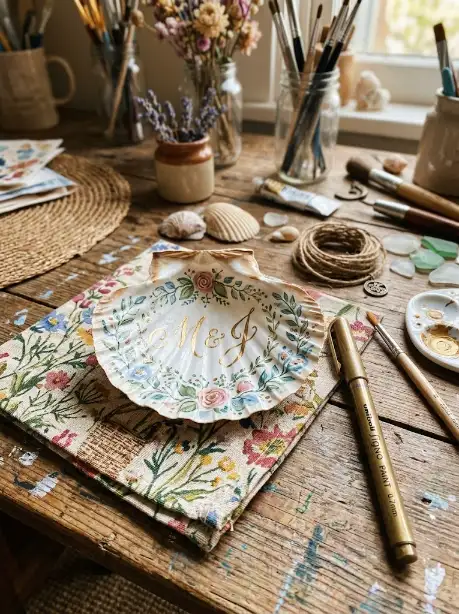
Adding personal initials transforms simple decoupage shells into meaningful handmade keepsakes. Personalized shell crafts make wonderful gifts for birthdays, weddings, anniversaries, or decorative memory collections with sentimental value.
Use fine paint pens or tiny stencils for neat lettering placement. Combining decorative napkin art with custom initials makes every handmade seashell project unique while creating more thoughtful personalized craft designs.
14. Use Pastel Color Themes
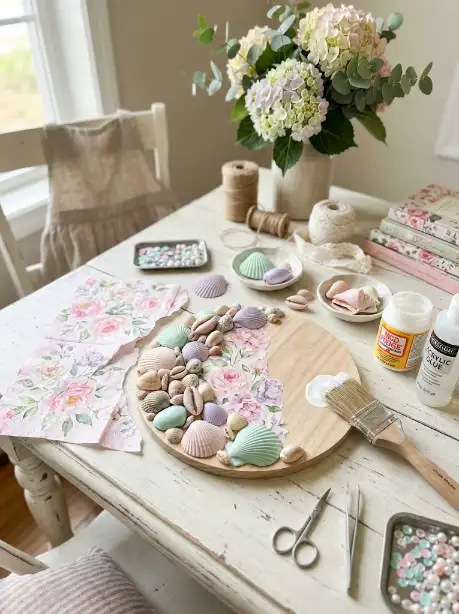
Soft pastel colors like blush pink, lavender, mint green, or baby blue create calming decorative seashell art that feels elegant and modern while matching aesthetic home decor trends perfectly.
Choose napkins with light-toned printed designs for a soft visual effect. Beginners often prefer pastel themes because subtle colors blend naturally and make handmade decoupage crafts look clean, stylish, and professionally finished.
15. Turn Shells into Gift Decor
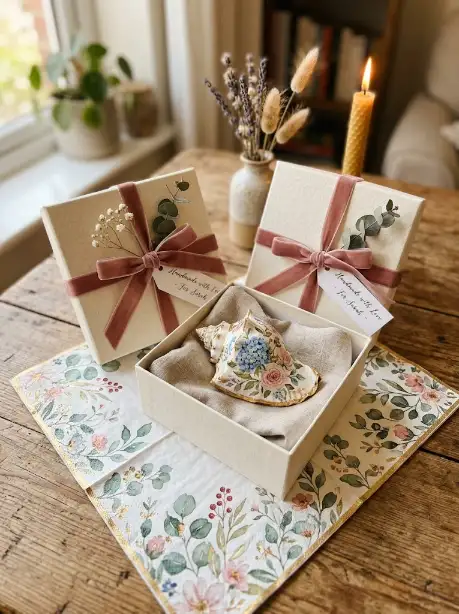
Decorated seashells make beautiful handmade gifts for friends, weddings, birthdays, and holiday celebrations. Unique handcrafted designs feel personal while offering a memorable alternative to traditional store-bought decorative presents.
Pair finished shells with gift boxes, ribbons, or small handwritten notes for elegant presentation. Handmade decoupage shell gifts combine creativity with sentimental value, making them ideal DIY craft projects for special occasions.
16. Display in Decorative Bowls
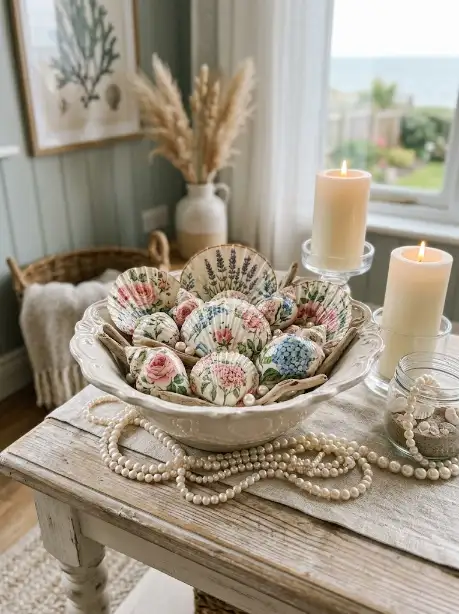
After finishing your seashell art, display multiple decorated shells together inside glass bowls, decorative trays, or shelf arrangements. Proper presentation makes handmade crafts look more stylish and highlights their detailed artistic beauty.
Mix shells with candles, pearls, dried flowers, or beach sand for extra visual appeal. Decorative display styling transforms simple decoupage shells into beautiful statement decor pieces perfect for modern interior decoration.
Conclusion
DIY napkin decoupage on seashells is one of the easiest beginner-friendly craft projects for creating elegant handmade decor with a personal artistic touch. From floral patterns and pastel colors to vintage prints and coastal designs, every seashell becomes a unique decorative piece.
These creative DIY craft ideas help beginners practice decoupage techniques while making beautiful gifts and home decorations. Experiment with different colors, textures, and patterns to discover your own style and transform ordinary seashells into stunning decorative art pieces full of creativity and charm.